AI extraction is usually right. When it's not, fix it in a few clicks.
Opening edit mode
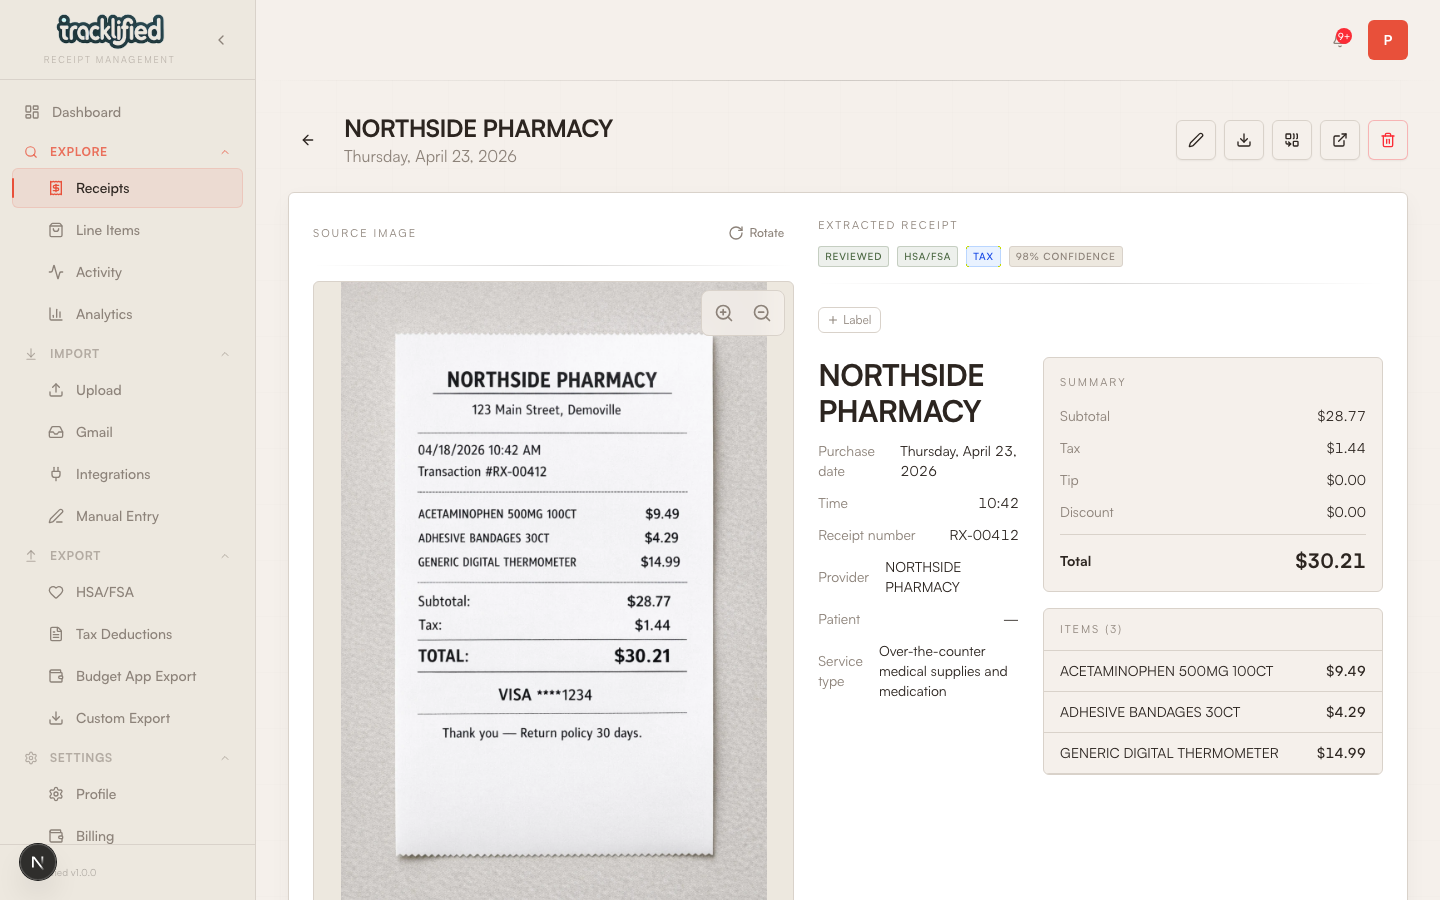
Click any receipt from the receipts list. You'll see the receipt image on the left and extracted data on the right. Click the pencil icon to enter edit mode.
What you can edit
- Merchant name
- Date and time
- Receipt number
- Totals — subtotal, tax, tip, discount, total
- Line items — add, remove, rename, re-price
- Labels — add or remove any label including HSA/FSA and Tax
- HSA-specific fields (for eligible receipts)
Common fixes
Merchant looks weird ("SQ *STORE NAME" or similar). Click the merchant field and type the real name.
Date is wrong. Thermal receipts fade. Click the date to correct.
Total off by a cent or dollar. Manual override. Happens on faded receipts.
Missing line items. Click Add item, fill in description, quantity, and price. Useful for recovering detail from a poor-quality scan.
Wrong HSA/FSA or Tax label. Go to labels, toggle off what's wrong, add what's right.
If the image itself is bad
If the original image is unusable (too dark, glare, wrong orientation), the cleanest fix is to delete the receipt and re-upload a better image. Use the delete/trash action on the receipt detail view.